
My list was:
Black Orc Big Boss
Akkrit Axe, Enchanted Shield (re-roll hits, +1 armor save)
Black Orc Battle Standard Bearer
Best Basha, Effigy of Mork (+ 1 WS, S, I, -1 to hit for enemies)
Night Goblin Shaman
Level 2, Itty Ring, Magic Mushrooms x3 (bound spell, 1 extra PD for each shroom)
23 Orc Boyz x2
w. Choppa, Shield
10 Arrer Boyz
5 Spider and Wolf Riders x2
w. Spears
12 Black Orcs
w. Waaagh! Banner (+D6 charge move, one use)
Squig Herd
4 hunting teams
3 Trolls
The Empire list came in looking a lot like I expected, only with no magic defense what so ever. I suppose he didn't expect me to bring a shaman. His list looked something like this:
Captain of the Empire
Captain Battle Standard Bearer
Master Engineer
24 Spearmen x2
1 detachment each
10 Halberdiers x2
detachment
5 Knights x2
10 Crossbowmen x2
5 Outriders x2
Great Canon
Helblaster Volley Gun
The terrain had some ruins in the northwest, a giant boulder in the north, and a large hill with rocky outcrops in the east. A small forest clearing could be found in the southeast, with a hill west of it and a line of bushes to the far west that provided soft cover.
I rolled for spells and got a 5 and a 6, which I turned into 5 and 1, meaning Foot of Gork (cast on 9+, D6 S6 hits anywhere on the table) and Gaze of Gork (18" magic missile, D6 S2 hits no armor saves allowed).
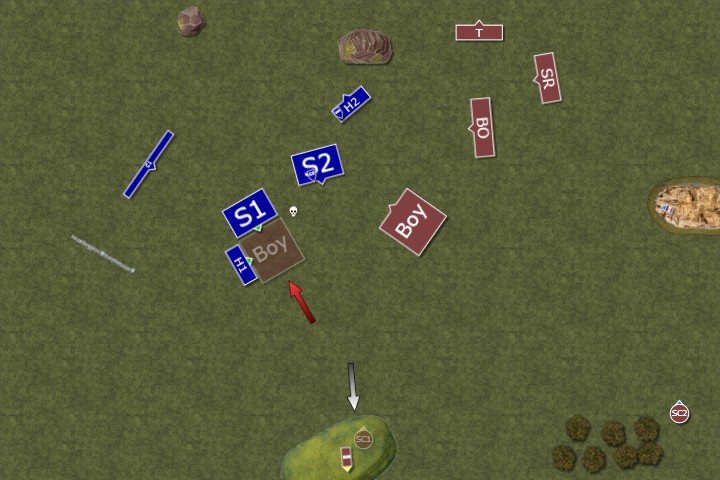
Deployment:
The Horde gathers in the south while the Empire troops set up in the north. Deployment becomes a tactical affair, with both armies fielding a similiar amount of units. He deploys his shooting early, followed by the spearmen and their respective detachments. After placing my fast cavalry and my orc blocks, I match up with my arrerz boyz against his outriders on the western flank. Since they can't move and fire, I'm hoping to stick around long enough to cause a panic test on them. When the helblaster closes out the western flank, I realize that's far too much shooting for me to last against, so I deploy the Squig Herd, which is immune to psychology, and figure I'll just march up and pray I'll get into combat before they go wild. Instead, I place my trolls and the black orcs in the east to match up against the two knight units. My General goes to lead the eastern orc boyz in order to control the trolls, while I figure the BSB and his unit should be able to hold out in the middle until my hard hitters can swing around. If they manage to beat the knights, of course.

Turn 1 - The Empire
The Empire wins the first round and does very little. Only the cannon and the crossbowmen are within shooting reach, and causes very few casualties.

Turn 1 - Orcs & Goblins
The Squig Herd squabble and the Trolls fail to heed the orders of the Big Boss, so they both fall behind the rest of the line, as the Horde moves forward. The greenskin magic starts out proving to be extremely fatal to the Empire, as the Shaman leaves the Black Orcs and chews a magic mushroom (and survives!). Gaze of Gork takes out two of the knights closer to the centre, while the western Outriders suffer three casualties from the Foot of Gork. Finally, the Itty Ring takes out another knight, leaving only two left standing. Both units pass their panic checks, though. The Arrer Boyz, who've reformed into one long line, fail to hurt the Outriders overmuch (surprise!).

Turn 2 - The Empire
The Knights refrain from charging, realizing that even if they would make it to the Spider Riders ontop of the hill, they'd be stuck in difficult terrain with their flank exposed to the Black Orcs, which they probably don't want, although they probably do want to stop the shaman from causing any more armor-ignoring spells on them. On the west side, a detachment moves up to block the Volley Gun from being charged by the Wolf Riders in the next turn.
Shooting causes plenty of casualties, with the east Orc unit losing a rank, the Trolls losing a wound, the Wolf Riders losing three of their numbers, and the Arrer Boyz sent running for their efforts.

Turn 2 - Orcs & Goblins
On the second turn for the greenskins, the Big Boss calls for the Waaaaagh! and the troops move forward. Still too far away from the footsloggers to get within charge range, the Big Boss declares a solo charge on the Outriders that have been shooting his boyz to pieces. They stand and shoot, causing the boyz to test for panic which they pass and so the Big Boss makes it into combat on his own. Excited for him, I actually forget to declare a charge with the Spider Riders on the eastern hill, facing the canon, so instead they have to settle with moving up close to march block. The Black Orcs, even with the Waaagh Banner, are too far away from daring to risk the charge on the knights. The Arrer Boyz fail to rally on an 8, so they run off the board to hide from the salves of the Outriders and the Crossbowmen, having done nothing else than soak up shooting for two rounds. 65 points well spent!
Magic continues to be extremely lethal, with the two best spells in my spell book when facing the Empire. The Gaze of Gork and the Itty Ring are both let through and manages to take out the entire unit of knights far out on the east flank, while the Empire fails to dispel the Foot of Gork that destroys what remains of the western Outriders. The Spear Chukkas then both hit their target, the two remaining knights of the second unit, who die with spears through their chests. Thus the entire eastern flank of the Empire breaks down, leaving the Trolls and Black Orcs with little to fear on that side. Panic checks are forced all across, but the Captain of the Empire manages to keep his line intact for now.
In combat, the Big Boss and his boar kills three of the five Outriders, preventing them to strike back, but with the aid of the BSB nearby they hold on for another round of combat.

Turn 3 - The Empire
The Empire keeps up their shooting, with the canon grapeshotting the spider riders but managing only to kill a single rider. On the western side, the Volley Gun misfires and explodes, but not before emptying all their pipes straight into the Squig Herd, with 24 hits decimating them to less than half their unit strength, and only a few squigs remaining! The Crossbowmen take out the final two wolf riders in the west, while in the east more boyz fall to bolts, bringing them to less than half of their original size.
In combat, the Big Boss kills the two remaining Outriders and wipes out the unit, but is outside the arc of seeing the detachment of halberdiers and the Captain with the Battle Standard.

Turn 3 - Orcs & Goblins
On the east flank, the Spider Riders finally remember to charge into the cannon, and the crew decide to stand firm in protection of their machine. Meanwhile, the Black Orcs and the Trolls combine to charge into the Crossbowmen, but they both find themselves just out of reach (even with the Waaagh! Banner) and the trolls receive a bolt in the gut for their efforts. I probably should have retreated with the Squig Herd, but instead they move slightly forward, with no tempting targets really available to them (what with the helcannon blowing up). The Big Boss joins up with his unit once more.
Realizing that the detachments might become a problem for the boyz if they ever get into combat, the shaman from ontop of the eastern hills start decimating the western most unit of halberdiers with a Foot of Gork. The nearby unit of Crossbowmen lose one of their numbers to the Itty Ring.
The Spear Chukkas fire into the top most Detachment and clears out an entire rank of Halberdiers, but they are not to be panicked.
The battle between the Spider Riders and the canon crew comes to a draw, with the crew holding one for another turn. At least they're not firing the canon any longer.

Turn 4 - The Empire
The western detachment, after being stomped by the Foot of Gork, decides to tempt their fate by charging what remains of the Squig Herd, while the rest of the army moves around the battlefield, unwilling to do much charging since they're wielding spears.
Shooting brings down the eastern unit of boyz to little more than a rank, causing another panic test but the Big Boss keeps the ladz in check.
The bravery of the detachment pays off, as they defeat the Squig Herd in combat, but lost a handful of their numbers from the wild squigs that eats up a few spearmen in the parent unit as well. To the far east corner, the crewmen continues to hold out against the fierce attacks of the Spider Riders.

Turn 4 - Orcs & Goblins
Outnumbered and unwilling to risk a counter-charge by the Halberdiers even if I would make it there, my western unit of boyz hold back, but the BSB combine with the Big Boss to charge out of their respective units and into the detachment with the BSB, figuring that even if I can't wipe the battlefield with the spear units, at least I'd gain a handful of points if I run down the BSB against the large rock behind him and his unit. The Big Boss makes it into combat easily, but my BSB is right on the edge. We decide to roll for it, and I lose, meaning the BSB is left stranded away from combat and his unit, and the Big Boss fights alone.
The Black Orcs charges the Crossbowmen but realizes they'd end up clipping the Trolls, so I'm forced to charge with them as well. I would have rather turned the Trolls around to add some hitting power against the spearmen, but that's how it goes when you're out of range for the charge and run on top of each other.
Having climbed to the top of the eastern hill, looking over the battlefield, the Shaman miscasts and takes a wound for his trouble, screaming out his misery across the battlefield.
Going east to west, the Spider Riders finally kill the crewmen and destroys the canon after the longest combat of the entire battle. The Crossbowmen stand little chance against the Black Orcs and the Trolls, and they are slaughtered down to a single man, who runs away. Barking out orders, the Big Boss tries to prevent the Trolls from pursuing but to no avail, off they go northwards in hot pursuit. The Big Boss' attention would have been better spent elsewhere, as the Empire BSB steps up in a challenge, reveals a magic item that switches stats with me (not much, he gets a point of WS) then proceeds to pierce my 1+ Armor Save with his 3 S4 attacks, causing two wounds that kills the Big Boss!

Turn 5 - The Empire
With their general slain, things are not looking as bright for the greenskins, especially not with their BSB stranded right in front of the Empire Spearsmen. They declare a charge, and the BSB flees south between the units of boyz. Meanwhile, what remains of the northern detachment - fresh from their kill - turns around and moves for safety behind the large rock.

Turn 5 Orcs & Goblins
Misfortune continues for the Orcs as their BSB fails to rally and continues south, which worries the Chukka crew enough to have them retreat as well, running away from the battle in search of good hiding places. Without the Big Boss to give orders, the stupid Trolls trudge forward aimlessly. Even though they have no BSB, the western orc unit (until now more or less unharmed by missile fire) are within charging distance of the spearmen. Would I have had a character, I would not have hesitated, but now I'm a bit unsure. I realize I'm probably up quite a bit in points, so I could play it safe and back off, forcing the Spearmen to charge me instead. But it's a friendly game, and without a big enough detachment they won't remove my ranks, so I decide to charge in. If I manage to hold on for a turn, it might force the second unit of Spearmen to flank me, leaving themselves open for a charge by the Black Orcs in my final turn. Besides, it'd be un-orcy not to charge when you're able to!
Far away from juicy targets, the Shaman has run out of magic mushrooms. Trying to send the Crossbowmen in the east running for cover, he attempts a Foot of Gork but it is dispelled.
The battle between the Orc Boyz, the Spearmen and the three Halberdiers prove to be as bloody as expected (meaning very little blood at all). Both sides manage to kill an enemy each, and the Orcs actually lose by one from being outnumbered. Unfortunately for them, they still break and are chased down by the Halberdiers.
Turn 6 - The Empire
Too far away from charging anything, the Empire troops decide to spread out in order to claim table quarters in their final turn. The Captain leaves the center unit in order to join up with the other unit of Spearmen, heading south after defeating the Orcs, while the BSB sends the Detachment to safety behind the rock while he goes to join the center unit. Thinking perhaps to challenge my side of the table, no longer needed to flank charge, the center unit moves up against what remains of the last unit of Orc Boyz.

Turn 6 - Orcs & Goblins
The decision to move up proves to be costly, as it opens up the Spearmen for a flank charge from the Black Orcs. I'm not sure if my opponent simply lost his mind, or reasoned that with the BSB they should still be able to hold on until the end, but the Black Orcs care little and gladly charges into their flank. What I don't want is for the small unit of Boyz to join them, but as bad luck has it, they roll up a "We'll show em!' and seeks to join the fray. For sake of excitement, we measure before we roll the distance, and finds that they are 3" away from the Spearmen. I roll the dice and it shows... a 2, meaning they won't be forced to charge, and this time I'm not being as bloodthirsty. The Trolls actually passes a Stupidity check, and the BSB rallies on top of the southern hilltop.
Hoping to kill off enough Crossbowmen to send them fleeing, or at least unable to claim a table quarter, the Shaman succeeds with his final Foot of Gork. Luckily for the Empire, it still leaves six men standing, meaning full points for the unit and a table quarter contested.
The final combat of the entire battle pits the Black Orcs against the Spearmen in the flank. Hungry for kills, the Black Orcs switches to two choppas and proceeds to hack up seven of the unlucky soldiers. With their ranks cut off, a flank, a banner and a rank of their own, along with seven casualties, the Black Orcs prove too much for the Spearmen and the BSB, who are now testing on double 1's. Despite having two attempts, there is no insane courage and the soldiers are chased down and hacked to pieces by the Black Orcs, who persue far enough to bring them into the southwest table quarter and challenge the last Spearmen unit for supremacy over that one, just as the dust settles and the battle is over.

Result: Solid Victory to the Orcs & Goblins, with about 500-600 points in my favour. I think the big difference was that my list was far better equipped to deal with his list, than he was with mine. It was no more evident than in the case of the Night Goblin Shaman, who took out two units of Knights and a unit of Outriders basically on his own, thanks to a favorable spellbook and his lack of magic defense. My power dice rolls were high overall, in particular in the beginning when I always hit a 9+ with three dice, while his shooting rolls were below average in the first couple of turns. These things tend to even out as you go and they did, earning him a few points, but by then it was a little bit too late.
I deployed my Trolls and the Black Orcs to deal with his knights, only to see them get fried in their armor before any combat, meaning my units were left with no things to hit for longer than I had planned. Also, if only the BSB had been able to join the Big Boss in the combat against the detachment, I probably wouldn't have lost him. Still, the added mobility of keeping your characters on boars really came into play in this match. With one round of marching, followed by the Waaagh in the next turn, you can get your characters into combat with shooty units real quickly.


No comments:
Post a Comment